How to Flip an Image in Google Slides
Step by Step Guide to Flip an Image in Google Slides Presentation
Have you ever wanted to mirror an image in your Google Slides presentation, perhaps to better fit a layout or create a specific visual effect? While Google Slides is packed with intuitive features, finding the “flip” option for images isn’t always immediately obvious. Don’t worry, it’s a simple trick once you know where to look! This step-by-step guide will walk you through the quick and easy process of flipping images horizontally or vertically in your Google Slides, helping you perfect your presentations with ease.
Steps to Flip Images in Google Slides
Step 1: Insert Your Image If you haven’t already, insert the image you want to flip into your Google Slide. You can do this by going to “Insert” > “Image” and choosing your source (e.g., “Upload from computer,” “Search the web,” “Drive”).
Step 2: Select the Image Click on the image you’ve inserted to select it. You’ll see a blue box with small squares around its perimeter when it’s selected.
Step 3: Access Format Options There are a couple of ways to access the formatting options:
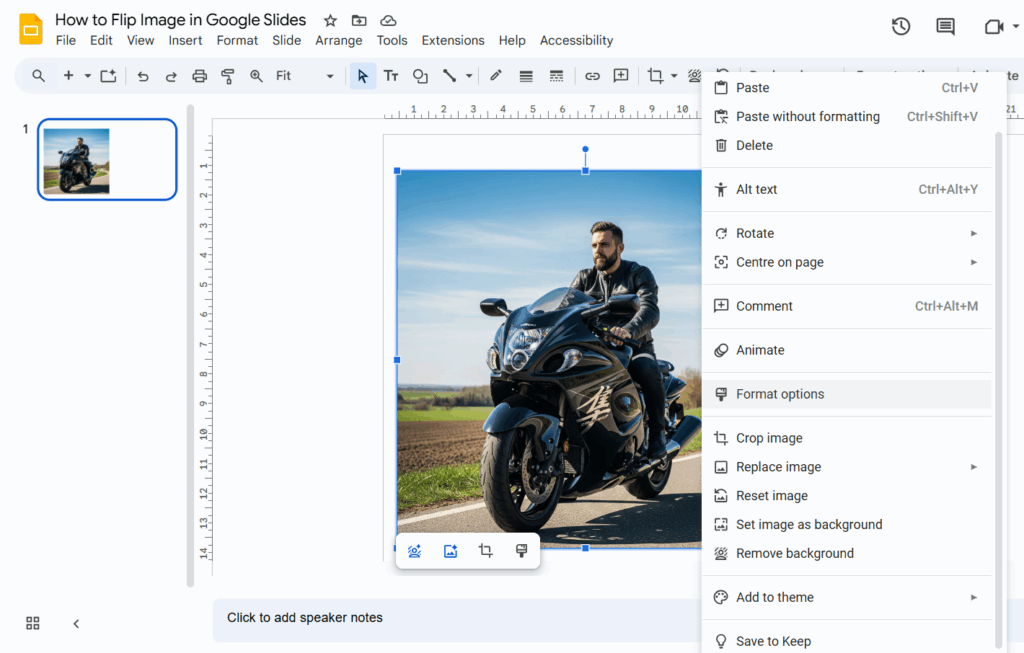
- Right-click: Right-click on the selected image. A context menu will appear.

- Format Options in Toolbar: With the image selected, you’ll see “Format Options” appear in the toolbar at the top of the screen. Click on it.
Step 4: Open Size & Rotation Settings In the “Format Options” sidebar that appears on the right side of your screen (or in the context menu if you right-clicked), look for the “Size & Rotation” section. Click on the arrow next to it to expand the options.
Step 5: Flip the Image Within the “Size & Rotation” section, you’ll see options for “Flip horizontally” and “Flip vertically.”
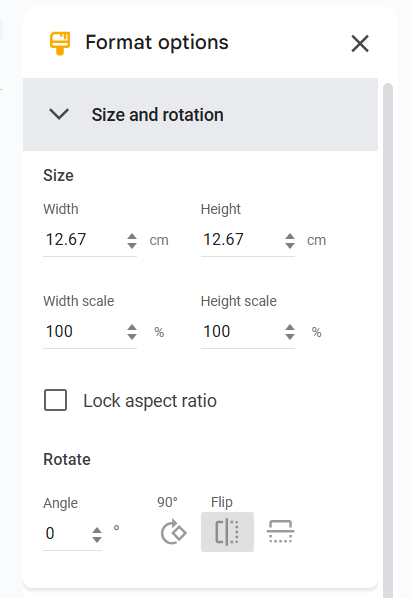
- Flip horizontally: Click on ” Flip horizontally ” to mirror the image from left to right.
- Flip vertically: Click on ” Flip vertically ” to mirror the image from top to bottom.
Your image will instantly flip according to your selection!
Benefits to Flip Images in Google Slides
- Boost Visual Appeal and Aesthetics: Flipping an image can significantly improve its integration into your slide’s layout. It helps create a more balanced and harmonious composition, ensuring your visuals are easy on the eyes and contribute to a polished look. Sometimes, an image just needs to “face” the other way to truly click with the rest of your content.
- Achieve Symmetry and Balance: If you’re aiming for a perfectly symmetrical design, flipping an image is your go-to trick. It’s ideal for mirroring elements and creating a sense of balance, adding a level of professionalism and intentional design to your slides.
- Improve Layout and Flow: Images often come with a built-in “direction” or implied movement. A simple flip can reorient an image to guide attention towards your key message or create a smoother visual flow, helping your visuals fit perfectly into the available space.
- Correct Orientation Issues: We’ve all been there – an image imported into Google Slides appears sideways or upside down. Instead of re-uploading or wrestling with complex edits, a quick flip can instantly correct these orientation mishaps.
- Add Creative Flair and Unique Effects: Beyond practical corrections, flipping images unlocks creative possibilities. You can use flipped images to create interesting reflections, generate abstract patterns, or add an unexpected visual twist that makes your presentation memorable.
- Direct Audience Focus: A subtle but powerful benefit of flipping images is its ability to direct your audience’s attention. If a person in an image is looking off-screen, flipping them can make them appear to look towards your important text or another key element on the slide.
Final Words
And there you have it! Flip or mirror an images in Google Slides is a straightforward process that can significantly enhance your presentation’s visual appeal and design. Whether you’re aligning images for a symmetrical look, correcting an awkward orientation, or simply experimenting with different visual effects, mastering this simple trick will give you more control over your slide design. So go ahead, experiment with flipping your images and take your Google Slides presentations to the next level!
About The Author