How to Make an Image a Circle in Google Slides
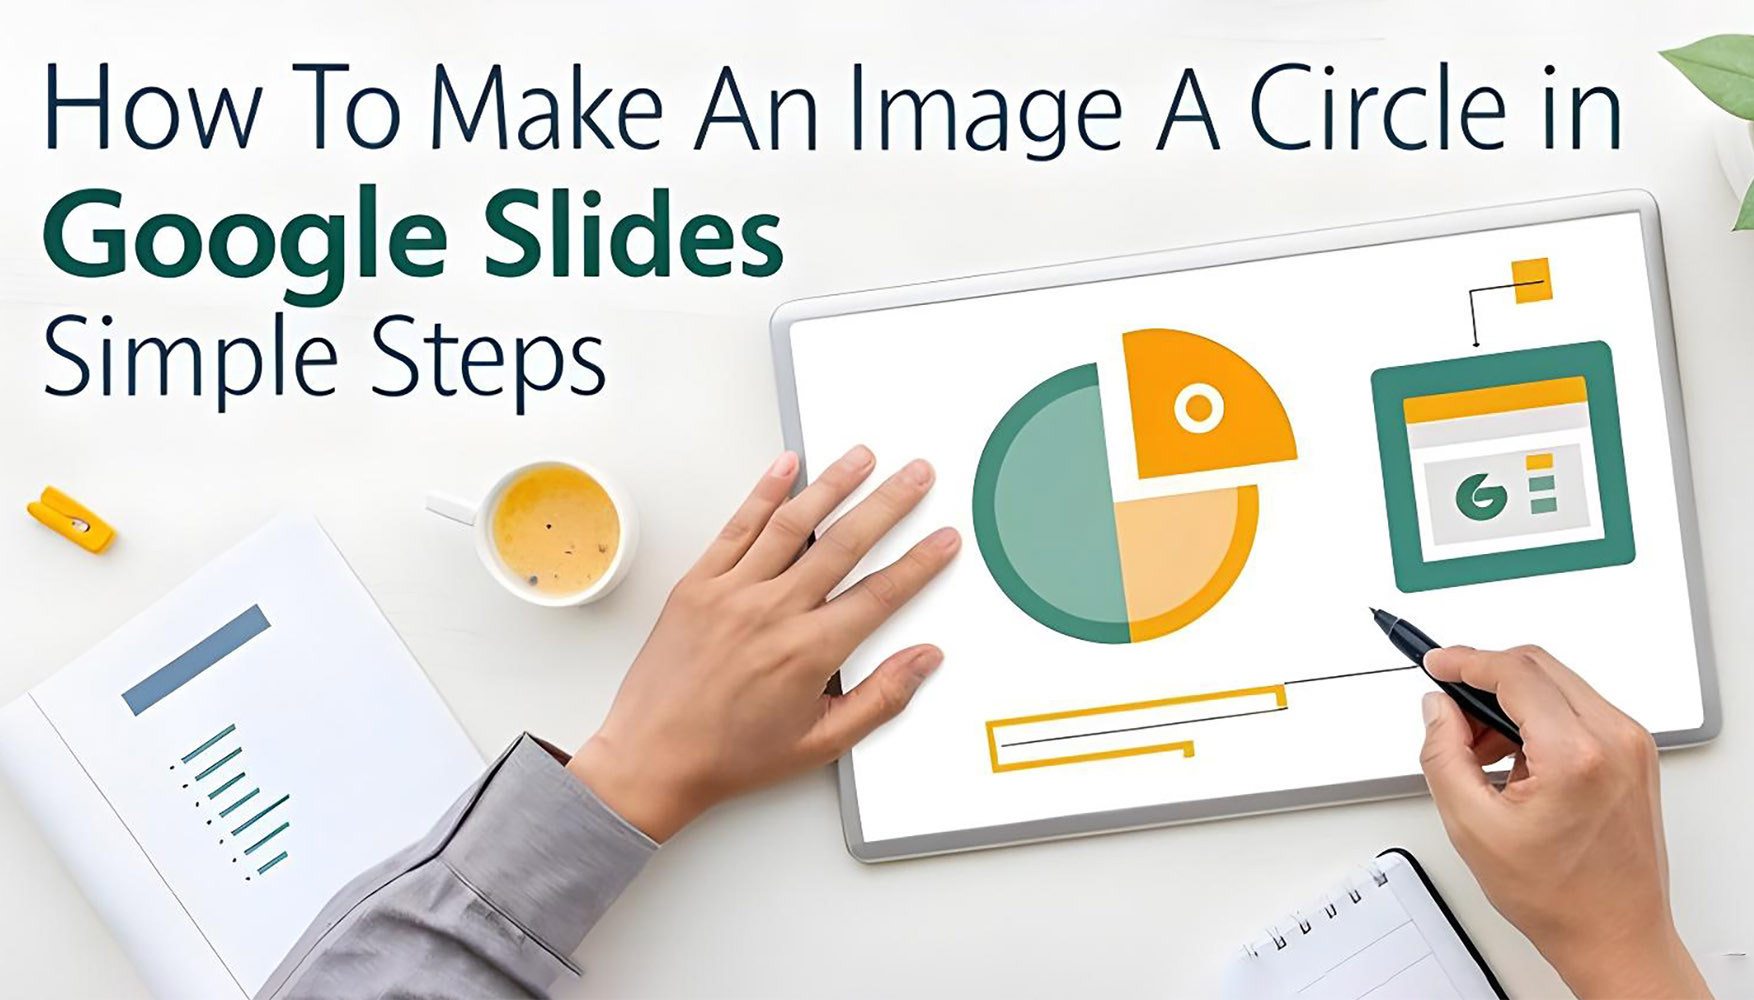
Guide to Make an Image Circular in Google Slides
A compelling Google Slides presentation is all about crafting informative content paired with stunning visuals, making complex information more engaging and easily retained. And when it comes to visual storytelling, Google Slides is a remarkably versatile presentation tool that empowers you to create captivating visual experiences.
One simple yet effective way to elevate your slides is by creatively adjusting the shapes of your images. Among the many possibilities, transforming a standard rectangular image into a sleek, professional circle stands out. This technique adds a polished, modern touch, perfect for profile photos, highlighting key elements, or simply enhancing the overall aesthetic of your presentation. Let’s explore how to make an image circular in Google Slides.
Why to Change the Shapes of Image in Google Slides?
Transforming images into circles or other shapes within Google Slides isn’t just about aesthetics; it’s about strategic visual communication. Image shape offers a focused, clean presentation, drawing the viewer’s attention directly to the subject. This is particularly effective for profile photos, where a circular format removes distracting backgrounds and emphasizes the individual. Furthermore, circular crops can add a modern, polished look to your slides, enhancing the overall professional feel of your presentation.
By breaking away from the standard rectangular format, you create visual variety, making your slides more engaging and memorable. Whether you’re showcasing team members, highlighting key details, or simply aiming for a more refined design, circular images provide a powerful tool for impactful visual storytelling in Google Slides.
Step by Step Guide to Make a Picture Circular in Google Slides
Here are the steps on how to change the shape of an image in Google Slides:
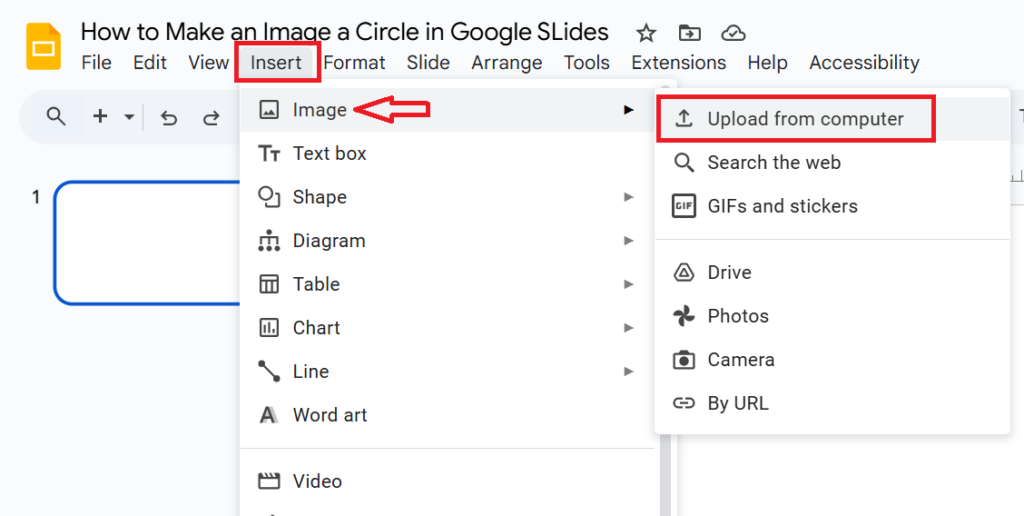
1. Insert an image:
- Open your Google Slides presentation.
- Click on the slide where you want to insert the image.
- Go to Insert > Image and choose your image source (computer, Google Drive, or search the web).
2. Select the image:
- Click on the image you just inserted.
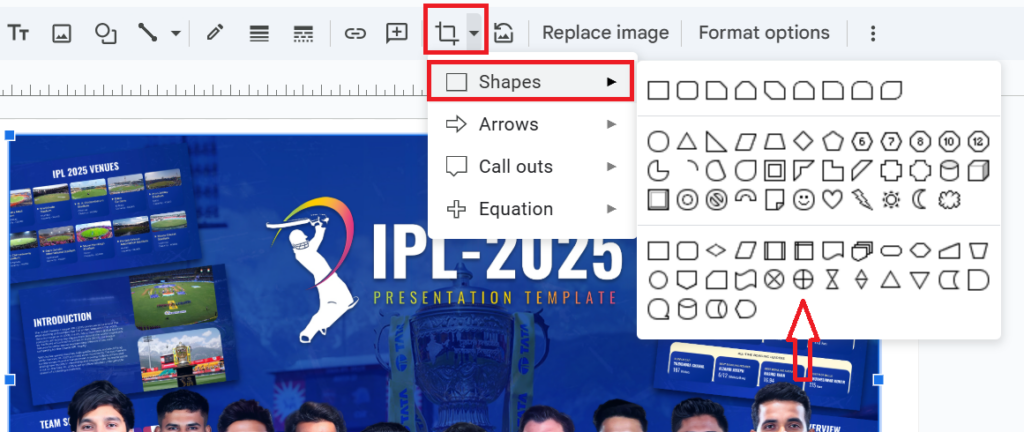
3. Open the “Mask Image” menu:
- In the top toolbar, click the small arrow next to the “Crop image” icon.
- Select “Mask Image” from the dropdown menu.
4. Choose a shape:
- A menu of different shapes will appear. Select the desired shape for your image (circle, square, star, etc.).
5. Adjust the shape (optional):
- After applying the shape, you can adjust it further:
- Resize: Drag the black handles around the image to resize the shape.
- Reposition: Drag the blue handles within the shape to reposition the image within it.
6. Apply the changes:
- Click anywhere outside the image to apply the shape mask.
Benefits of Changing Shape of an Image / Make an Image a Circle in Google Slides
- Enhanced Visual Appeal: Altering image shapes breaks the monotony of standard rectangular formats, adding visual interest and making your slides more engaging. By using shapes like circles, stars, or custom forms, you draw the audience’s attention and create a more dynamic presentation.
- Improved Focus and Emphasis: Shaped images can direct the viewer’s eye to specific elements within the image. For instance, a circular crop can isolate a person’s face in a portrait, while a star shape might highlight a key product feature. This helps to emphasize important details and ensures that your message is clearly conveyed.
- Professional and Polished Look: Using consistent and well-chosen image shapes can elevate the overall professionalism of your presentation. By creating a cohesive visual style, you demonstrate attention to detail and enhance the credibility of your content.
- Creative Storytelling: Image shapes can be used to visually represent concepts or themes. For example, a heart shape might be used to convey passion or love, while a speech bubble shape could represent dialogue or communication. This allows you to add layers of meaning to your visuals and create a more compelling narrative.
- Better Integration with Design Elements: Shaped images can seamlessly integrate with other design elements on your slides, such as text boxes, icons, and backgrounds. By using shapes that complement your overall design, you create a more harmonious and visually appealing presentation.
- Increased Memorability: Unusual or unique image shapes can make your slides more memorable. Viewers are more likely to remember presentations that feature visually distinctive elements, helping your message to stick in their minds long after the presentation is over.
- Customization and Personalization: Changing image shapes allows you to customize your presentations to reflect your personal style or brand identity. This level of personalization can help you to create a unique and memorable presentation that stands out from the crowd.
Conclusion
Don’t let your images remain trapped in boring rectangles! With the simple techniques outlined in this guide, you can unlock a world of creative possibilities within Google Slides. Whether you’re a seasoned presenter or just starting out, changing image shapes is a quick and effective way to add visual impact. So, open up Google Slides, insert an image, and start shaping your way to a more engaging and memorable presentation today!
Recent Blog Post –
About The Author